Here’s how to connect your first device.
Each device uses its own unique configuration.
You can create up to 10 active configurations per account.
Step 1. Log in to your dashboard
Go to https://trackaway.net/login and sign in using your email — no password required.
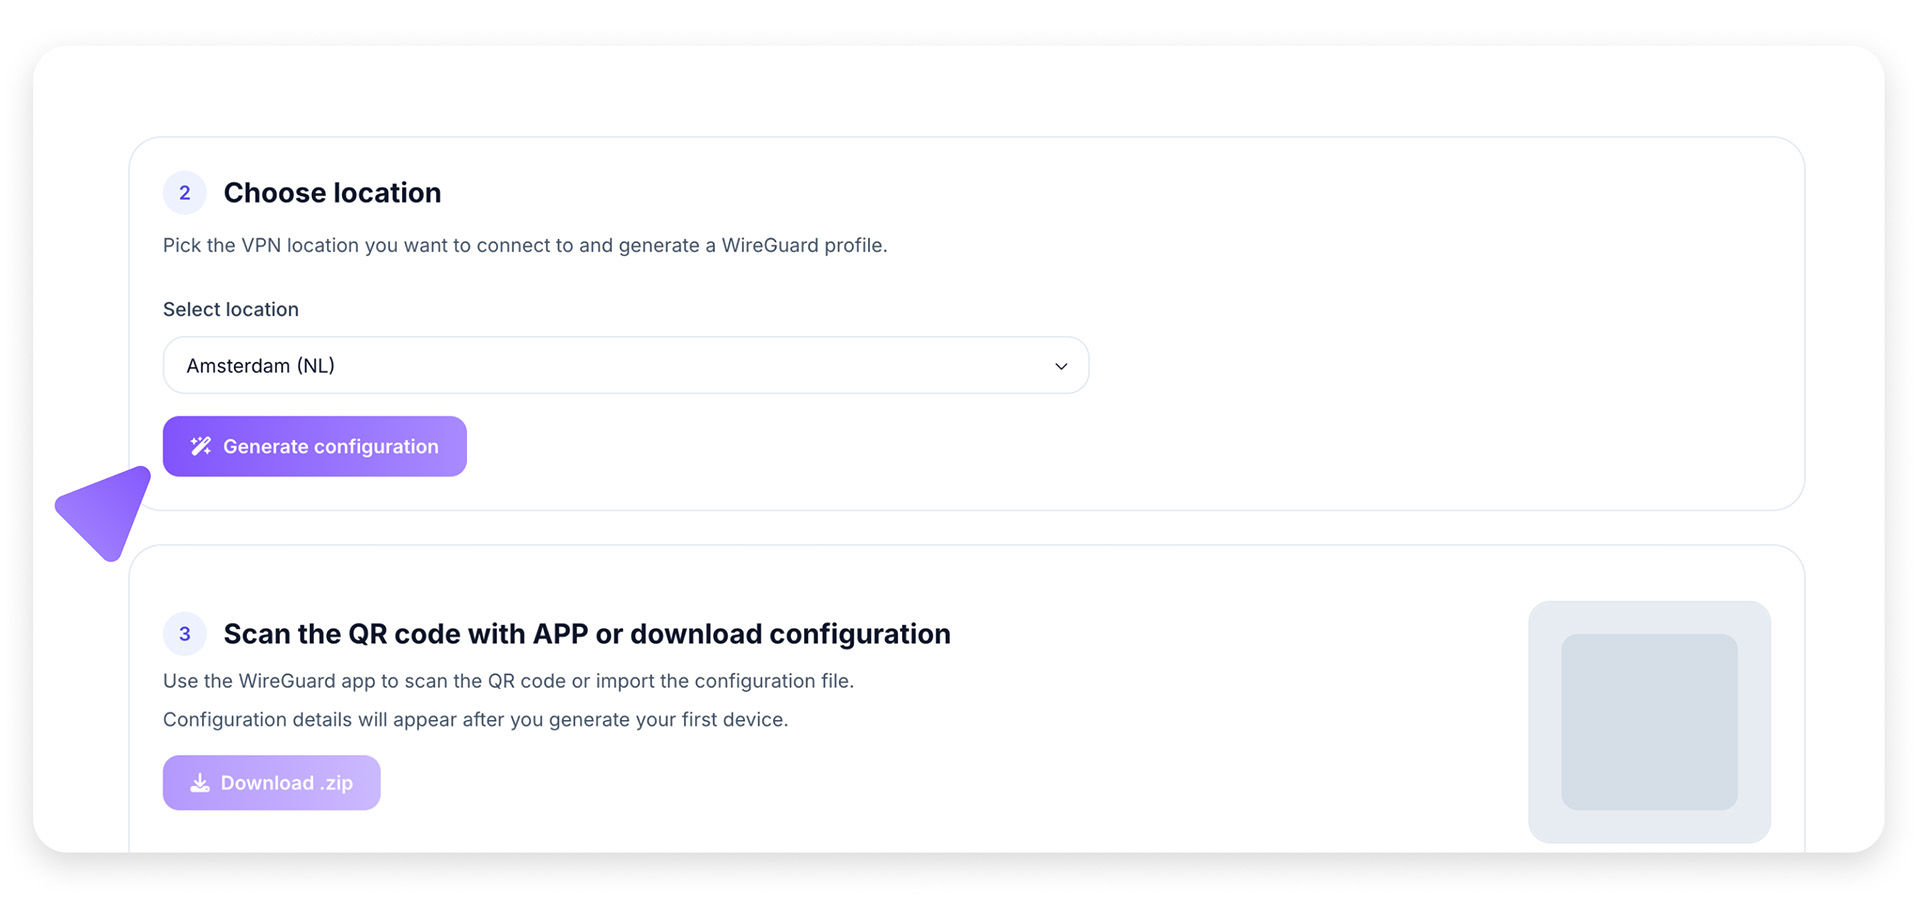
Step 2. Create a configuration
Choose your preferred location (for example: Amsterdam, Luxembourg, or Prague) and click Generate configuration
The system will:
- generate a secure WireGuard key pair
- assign it to the selected location
- display the configuration file in your dashboard
- send a copy to your registered email address
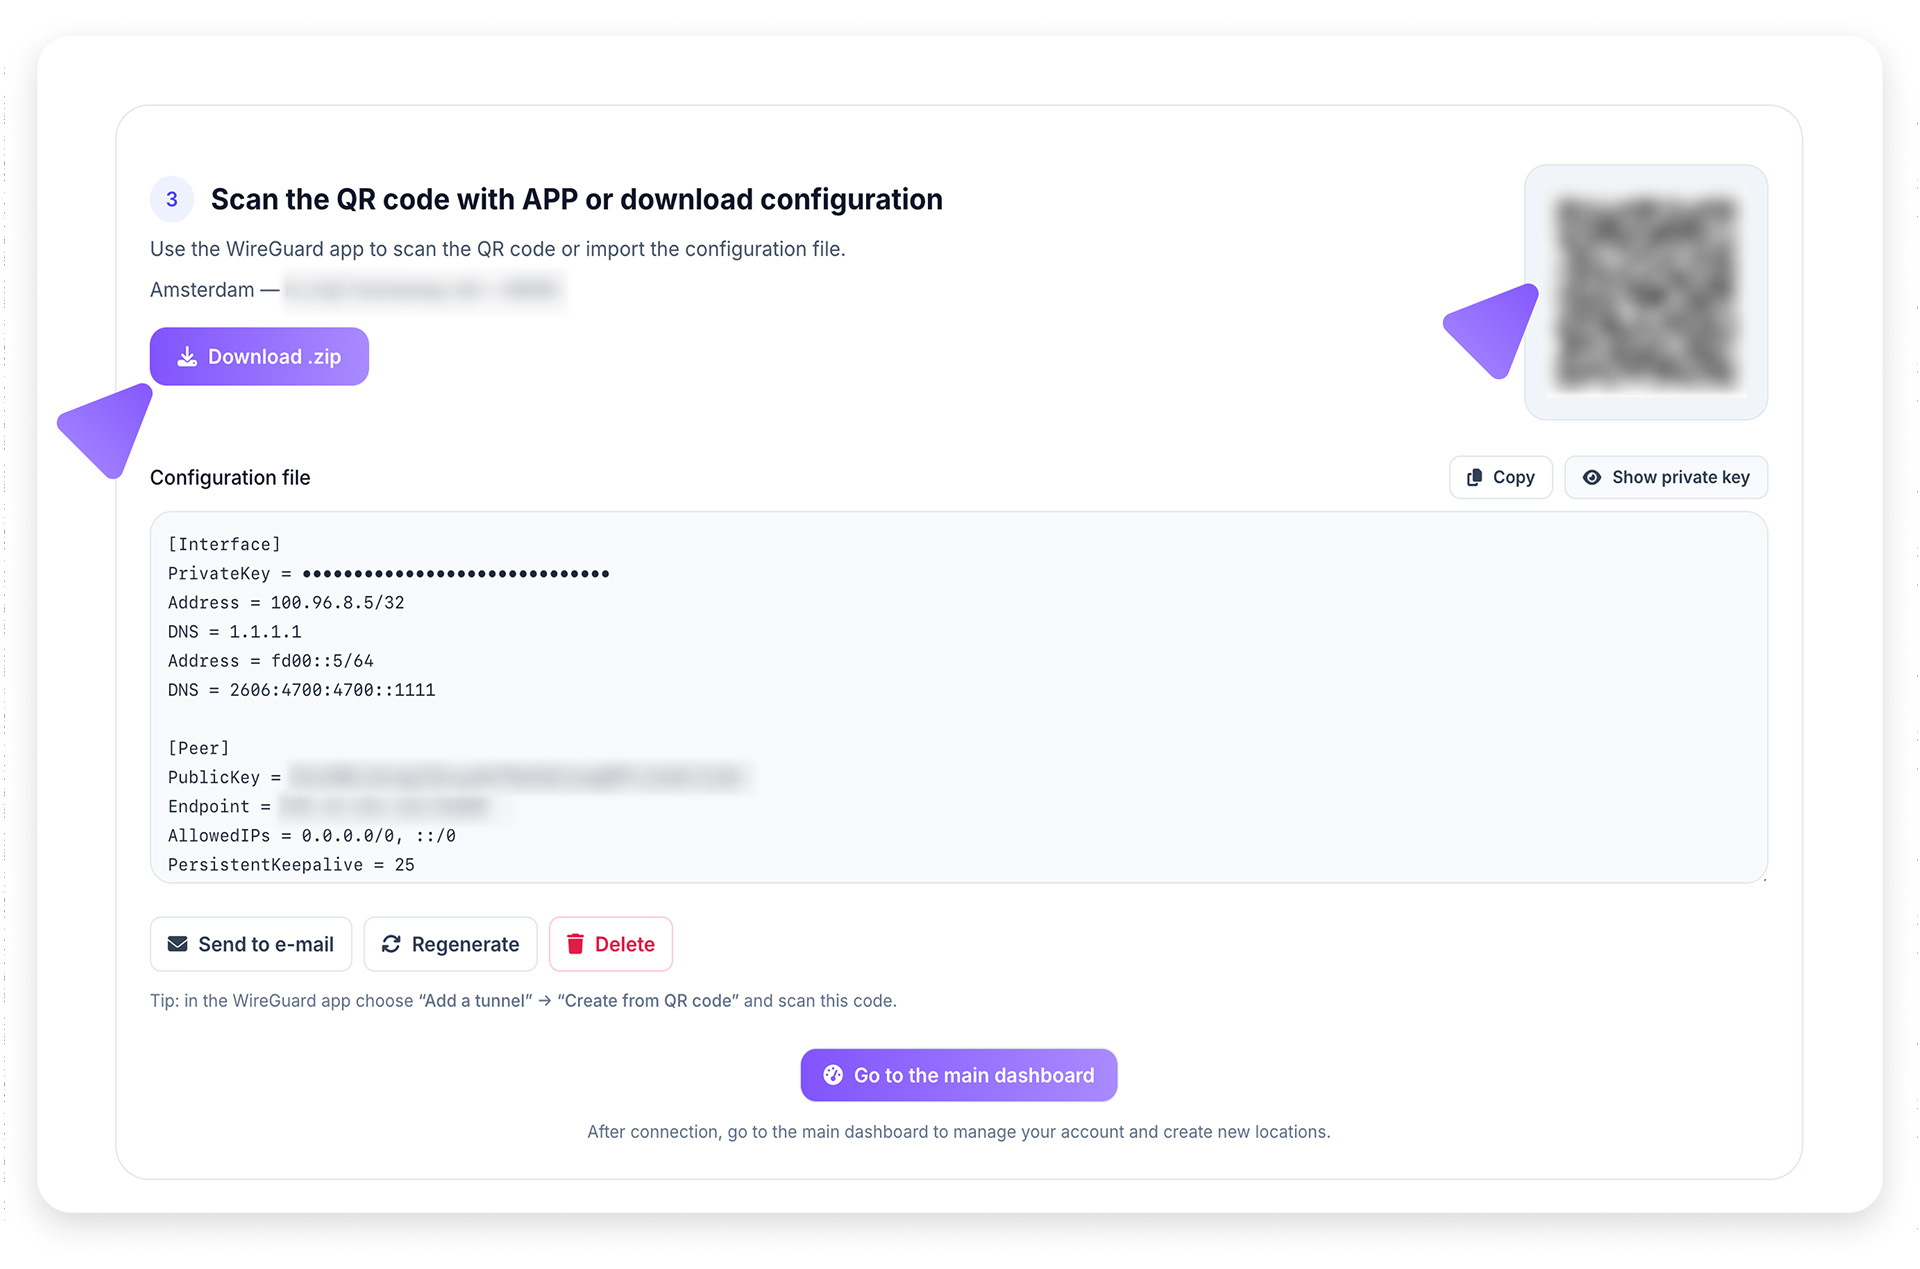
Step 3. Install the WireGuard client
You’ll need the official WireGuard app on each device.
Step 4. Add your configuration
In the WireGuard app, you can either:
Option 1 — Import from file
Download the .zip file from your dashboard or email, then import it into the WireGuard app.
Option 2 — Scan the QR code
Open the WireGuard app, then tap Add Tunnel → Scan from QR code and scan the QR displayed in your TrackAway dashboard.
Step 5. Connect
Activate the tunnel:
- In the app: toggle On
- On Linux: run
sudo wg-quick up trackaway
That’s it — your device is now securely connected to the TrackAway network.
Step 6. Verify
Visit https://trackaway.net/ip
to confirm that your IP address and region have changed.
Notes
- Each device = one configuration.
Do not reuse configs between devices — it will cause key conflicts. - You can have up to 10 active devices at once.
- You can revoke or recreate configurations anytime from your dashboard.